
An introduction to Test-Driven Development
02 Nov 2007Last week, I gave a short talk on Test-Driven Development, in C#, using NUnit, at the Silicon Valley Code Camp 2007. I was initially planning on posting the slides I presented, but it seemed to me that the dynamics of the process were getting lost, so I opted for a step-by-step tutorial, following essentially the code I wrote during the session.
I will follow-up shortly with another tutorial centered specifically on setting up and using NUnit, and then a few more on slightly more advanced questions. This first installement is aimed at C# developers who are not familiar with Test-Driven Development - and my objective is to provide you with the essential elements you need to get started, in an hour or so!
In a nutshell, and in the words of Kent Beck in “Test-Driven Development By Example” (Addison-Wesley), here are the steps of Test-Driven Development:
Red - Write a little test that doesn’t work, and perhaps doesn’t even compile at first.
Green - Make the test work quickly, committing whatever sins necessary in the process.
Refactor - Eliminate all of the duplication created in merely getting the test to work.
Step 0: starting point
Our mission will be to add a new functionality to an existing system, the “ShippingSystem”. The additional feature we need to put in place is the computation of the distance between cities that belong to the system. For the sake of the demonstration, we will take some liberties with reality, and conveniently assume that the world is flat, and that the distance between two points is simply:
distance(A,B) = sqrt((xA - xB)^2 + (yA - yB)^2)
To keep things simple, the “ShippingSystem” will be represented by a totally stripped-down version, namely a single class City.cs, with no members, methods or constructors, sitting all by itself in the “ShippingSystem” folder of project “IntroToTDD”. Of course, a real system would contain a gazillion of classes performing all sorts of fascinating things - but these other features are totally irrelevant to our point, and would just add confusion, so I will let your imagination fill in the gaps.
Step 1: set up NUnit
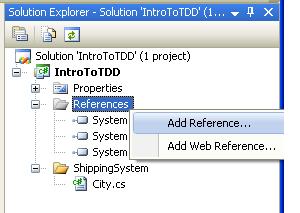
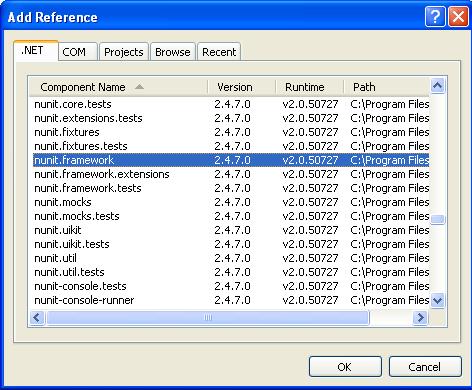
After installing NUnit on your development machine, add a reference to the NUnit.Framework to the project. In the solution explorer, right-click on “References”, select “Add Reference”, and in the .NET tab, select “NUnit.Framework”.
Add a new public class “TestsCity” to the folder ShippingSystem. This class will contain all the tests pertaining to the behavior of the class “City”. The class needs to be public in order to be visible from the NUnit GUI. Add “using NUnit.Framework” in the “using…” list, and the attribute [TestFixture] right before the line “public class TestsCity”. [TestFixture] declares that this class is a test fixture (duh!); tests that are added to that class will be visible through the NUnit GUI.
using System;
using System.Collections.Generic;
using System.Text;
using NUnit.Framework;

namespace IntroToTDD.ShippingSystem
{
    [TestFixture]
    public class TestsCity
    {

    }
}
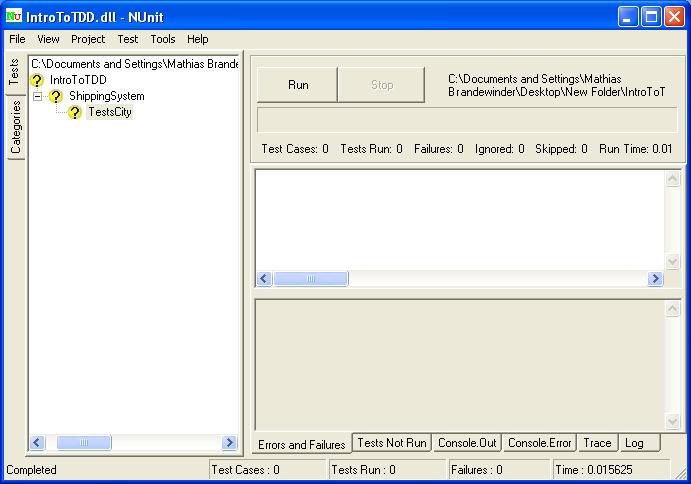
To verify that the setup was succesful, let’s check that NUnit can now “see” the test fixture. Rebuild your project (select Build > Batch Build > Select All > Rebuild), and open the IntroToTDD project with NUnit. Launch the NUnit GUI (from the Windows start menu), select Open Project, and navigate in the folder where your solution is stored. Go to IntroToTDD/IntroToTDD/IntroToTDD/bin/ , and select IntroToTDD.dll.
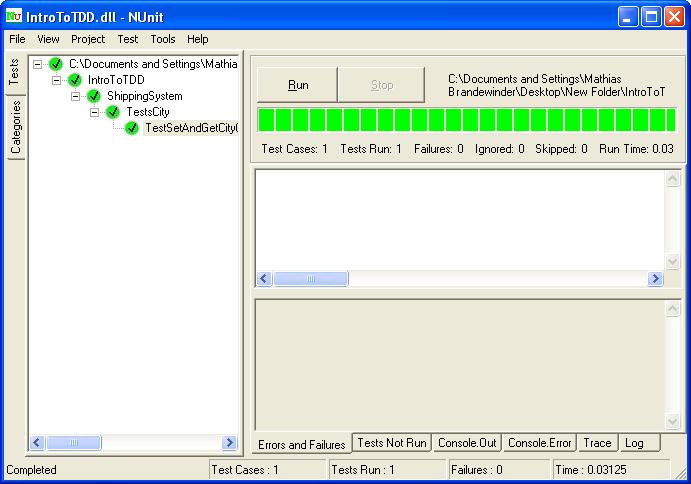
In the NUnit window, you should now see a tree view, with 4 levels of depth. Under IntroToTDD, there is a node ShippingSystem, containing another node “TestsCity”. NUnit can see that class because it is marked as a test fixture. Select the top node in the tree view, and press “Run”. All nodes should be marked with a ?, and on the right-hand side you should see in bold “Test Cases: 0 Tests Run: 0 “… This indicates that so far, there is no test to run. Let’s change that right now!
Step 2: write the first test
The first step in the process will be to write a test; fair enough, but what test should we write? Red - Write a little test that doesn’t work, and perhaps doesn’t even compile at first. The first idea which comes to mind would be to immediately test for the distance between 2 cities. Such a test would probably look something like “If City A has these coordinates, and City B has those coordinates, then the distance should be …”. We could start there, but that seems like a big first step, involving multiple functionalities which are not in place yet. So let’s take a mental note - or, much better, an actual note on a to-do list - and look for some easier step which would get us closer to the goal of having a running test.
One step in that direction would be to take a piece of the previous test, and focus on the statement “If City A has these coordinates…”. To compute the distance, we need City coordinates - how do we want to interact with these? To verify the coordinates of City A, we need to set them, and then check them. Let’s make this a test.
A test here is nothing more than a public method, written in a Test Fixture, prefaced by the attribute “Test”. Without worrying about whether it builds or works, let’s write a method “TestSetAndGetCityCoordinates”, which does just what we said:
[TestFixture]
public class TestsCity
{
    [Test]
    public void TestSetAndGetCityCoordinates( )
    {
        City sanFrancisco = new City( );
        sanFrancisco.SetCoordinates( 3.0, 4.0 );
        Assert.AreEqual( 3.0, sanFrancisco.XCoordinate );
        Assert.AreEqual( 4.0, sanFrancisco.YCoordinate );
    }
}
The test should be pretty self-explanatory: what we want to verify is that if we create a “City” sanFrancisco and set its coordinates to 3 and 4, we should be able to verify that the coordinates are now 3 and 4. “Assert.AreEqual” is the method provided by NUnit to validate that the system is in the state you expect it to be. Asserts come in multiple flavors; in this case, it will verify that the value you expect to see returned (which you have to explicity provide) is equal to the value that is actually returned by the system.
Step 3: get it to build
At that point, our code does not compile, because City knows nothing yet of SetCoordinates, XCoordinates and YCoordinates; we need to address that first. Let’s right click on the SetCoordinates() method, and select “Generate Method stub”, to automatically add it to “City”. Unfortunately, we can’t use that trick for properties, so let’s go to City and try to get to compile by changing as little as possible. Let’s add 2 read-only, internal properties returning 0.0, and let’s also remove the exception thrown in SetCoordinates().
public class City
{
    internal double XCoordinate
    {
        get
        {
            return 0.0;
        }
    }

    internal double YCoordinate
    {
        get
        {
            return 0.0;
        }
    }

    internal void SetCoordinates( double x, double y )
    {
    }
}
Now let’s
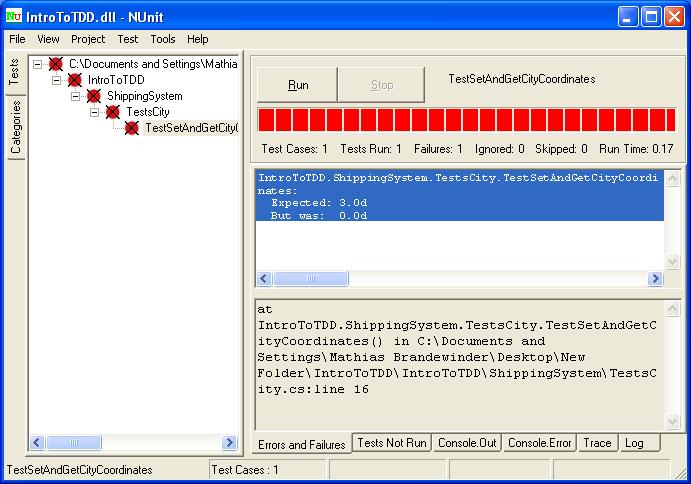
rebuild - success! We can now go to NUnit, and select “Reload project”. Under
the node “TestsCity”, we have now one new item, “TestSetAndGetCityCoordinates”,
which is the test we just wrote. Run the test: all nodes show up red, and on the
right a message says "IntroToTDD.ShippingSystem.TestsCity.TestSetAndGetCityCoordinates : Expected: 3.0d, But was: 0.0d".
The red signals that the test fails
(no surprise), and the reason is that while the XCoordinate of San Francisco was
expected to be 3.0, it was actually 0.0. Given that XCoordinate returns 0.0 no
matter what, this does not come as a surprise; we know what we need to do
next.
Step 4: get it to green
Now that we have a red test, we need to get to green - Our objective is to “Make the test work quickly, committing whatever sins necessary in the process”. There is a very small modification which would get us there: replace the hardcoded 0.0 returned by the properties, by the values the test expects. No doubt, it’s a sin, but the rules say we are allowed to do it, so let’s go for it:
internal double XCoordinate
{
    get
    {
        return 3.0;
    }
}

internal double YCoordinate
{
    get
    {
        return 4.0;
    }
}
Rebuild, run the test: the nodes in the NUnit tree view are now green. We are happy.
Step 5: refactor to remove duplication
At that point, you might feel a bit uneasy; the way we made the test pass is absolutely horrendous. That’s why there is a third step: “Eliminate all of the duplication created in merely getting the test to work”. Duplication usually refers to “code duplication”: the same functionality is performed in two (or more…) different places in the application, by equivalent code. There is no obvious duplication of that type here. On the other hand, we have “data duplication”: the same piece of data is hardcoded in two different places: in the code, and in the test that verifies it.
To remove the duplication, we simply need to change the code, so that instead of a hardcoded value, it operates on a variable. Let’s add two members m_XCoordinate, and m_YCoordinate, to City, and redirect the properties XCoordinate and YCoordinate to return the variable instead of a constant.
public class City
{
    private double m_XCoordinate;
    private double m_YCoordinate;

    internal double XCoordinate
    {
        get
        {
            return m_XCoordinate;
        }
    }

    internal double YCoordinate
    {
        get
        {
            return m_YCoordinate;
        }
    }

    internal void SetCoordinates( double x, double y )
    {
    }
}
We rebuild and run the test: we are back to red. Damn.
Step 6: get back to green
Why is the test back to red? NUnit tells us that while a 3.0 is expected in the test, the actual result is 0.0. After a quick inspection of the code, the source of the problem is clear: we have never passed the values of SetCoordinates to the member variables. Let’s fix that.
internal void SetCoordinates( double x, double y )
{
    m_XCoordinate = x;
    m_YCoordinate = y;
}
Rebuild, run the test: we are green.
As an aside, note how having a test in place just makes life easier: we introduced a small bug, but it immediately came to the surface. Granted, this case was pretty trivial, but it proves the point. Having tests is place is just so reassuring: you get instant feedback the exact moment you introduce a bug.
Step 7: refactor?
Is there any duplication left? No, so we can move one and add a new test.
Step 8: add a new test
Now we can get back to our initial test idea, “If City A has these coordinates, and City B has those coordinates, then the distance should be …”. Are we ready to take that one? I think so: the issues with coordinates are resolved, and the only new element here is that we need to verify a “Distance”.
The pattern we used in the previous iteration is called by Kent Beck “Fake it” (‘Til You Make It). Write a test that fails, make the test run by returning a constant, and gradually transform the constant into an expression using variables. We could use the same approach here, but for the sake of variety (and pedagogy) we will illustrate a different pattern, “Triangulate”. In the words of Beck again, “we only generalize code when we have two or more examples”. Let’s write a test with two examples of Distance computation:
[Test]
public void TestDistanceBetweenCities( )
{
    City sanFrancisco = new City( );
    City losAngeles = new City( );
    City paloAlto = new City( );

    sanFrancisco.SetCoordinates( 0.0, 0.0 );
    losAngeles.SetCoordinates( 0.0, 2.0 );
    paloAlto.SetCoordinates( 3.0, 4.0 );

    Assert.AreEqual( 2.0, sanFrancisco.Distance( losAngeles ) );
    Assert.AreEqual( 5.0, sanFrancisco.Distance( paloAlto ) );
}
To get it to build, we generate the stub for the Distance method, and clean up the return type and the argument name. Let’s run the test: we have a red test, and the message we get from NUnit is “method not implemented”: let’s implement.
Step 9: implement!
The difference between “Triangulate” and “Fake It” is immediately apparent here. Because we have two Distance computations checked in the test, there is no way we can hardcode a return value to get to green. We need to implement it for real. Let’s start, with the end in mind: we need to return a distance:
internal double Distance( City otherCity )
{
   double distance = 0.0;
   return distance;
}
Rebuild, and check - everything is still red. Let’s add the computation of the distance, as the square root of the sum of the square of the differences between the coordinates (or something like that):
internal double Distance( City otherCity )
{
   double deltaX = otherCity.XCoordinate - this.XCoordinate;
   double deltaY = otherCity.YCoordinate - this.YCoordinate;
   double distance = 0.0;
   distance += deltaX * deltaX;
   distance += deltaY * deltaY;
   return Math.Sqrt( distance );
}
We could stop there, but because we like our code to be totally self explanatory, we will rename “distance” to “squareOfDistance”, which is a better description of what the variable stores.
internal double Distance( City otherCity )
{
   double deltaX = otherCity.XCoordinate - this.XCoordinate;
   double deltaY = otherCity.YCoordinate - this.YCoordinate;
   double squareOfDistance = 0.0;
   squareOfDistance += deltaX * deltaX;
   squareOfDistance += deltaY * deltaY;
   return Math.Sqrt( squareOfDistance );
}
Step 10: refactor?
There is no obvious duplication left - we are done! You could still change a thing here or there, but at that point this would be mostly a matter of taste.
Conclusion
I came across Test-Driven Development through the book of Kent Beck a while back, and in all honesty I think it has been the most influential book in my practice of software engineering. What I tried to re-create here are the two things I liked most about it: its focus on simple and very actionable steps, which any software engineer can use, and the way the book itself is written; it literally showed code being written, page after page, with “live” commentary, and made it very easy to see how it was supposed to work when actually being used.
At the end of the presentation, someone asked me if I really used it. I definitely do, but I adapt the rhythm, depending on the circumstances. When writing very easy code, I would maybe skip a few steps and speed up the process; when I hit a difficult problem, I slow down and go back to very systematic red/green/refactor. It’s really a question of common sense, and of finding what works for you. There is one step I won’t skip, though - and that is writing tests as a go, hand in hand with writing code.