
Create an Excel 2007 VSTO add-in: adding a WPF control
02 Mar 2010Excel VSTO Add-In Series
- Getting Started
- Custom Task Pane
- Ribbon
- WPF Control
- Tree View
- Excel Events
- Part 1 Wrap
- Go To Cell
- Read Worksheets
- Display Differences
- Msi Installer
- Code on GitHub
Now that our Custom Task Pane is in place, and that we can drive its visibility with the Ribbon, it’s time to begin adding some real functionality to the add-in. In our next two installments, we will create a tree view in the task pane, which will display all the workbooks that are currently open, and the worksheets within each workbook. Later on, we will use that tree view to select the worksheet we want to compare the current active worksheet to.
I will use WPF to create our tree view, instead of a Windows Form user control. While WinForms is probably more familiar to most developers, I really wanted to use WPF in this example, because I love the flexibility it provides in user interface design, and because this is where the future of UI design is at. I can’t do a full tutorial on WPF here; I’ll try my best to explain what is going on and provide pointers, but if you haven’t seen xaml before, you will probably find some parts confusing – I hope the result will be interesting enough to motivate further exploration!
For the Windows Forms fans, Dennis Wallentin has an excellent tutorial on how to populate a WinForms tree view, for a very similar problem; I encourage you to check it out.
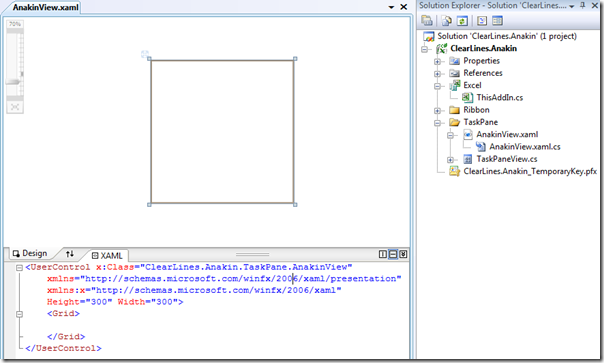
Our first step will be to add a WPF User Control to our project. In the TaskPane folder, where we have the TaskPaneView control already, let’s right click, add a new item, select “User Control (WPF)” – and not User Control – and name it “AnakinView”. A few things will happen: a new file, AnakinView.xaml is added to our folder, with a code-behind associated file, AnakinView.xaml.cs, Visual Studio automatically adds a few references into the References folder, to support the usage of WPF, and the screen is split in a dual mode: the top section shows how our control renders, and the bottom section displays the xaml code that forms our control.
We will keep things simple to start with, and implement the following behavior: the control will display a button, which when pressed will look up all the open workbooks, and display them and their worksheets in a treeview. Later on, we will look into something more fancy, and see if we can automatically refresh the contents of the tree, by tracking whether workbooks and worksheets have been opened, created or closed.
Let’s create the button first. In Visual Studio, click on the empty square in the design surface, and from the ToolBox, select a Button and drag it on the surface. You will see something like this appear:
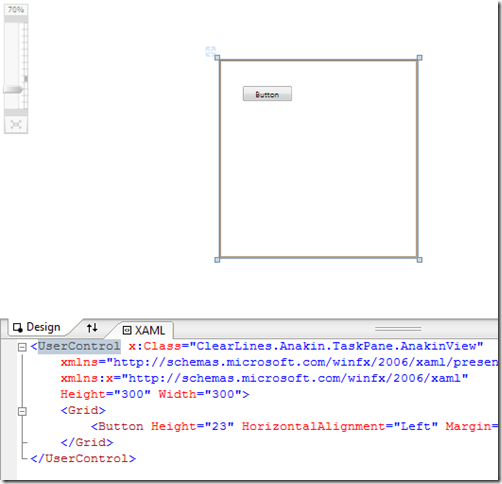
The button you just dragged is now visually represented, and in the XAML section, some code has been added. That code fully represents the button on display in the Design surface, and any change you do to it will be reflected in the representation. Let’s prove that point, and edit the code (note that when you click on the code for the button, the control gets highlighted in the Design surface):
<UserControl x:Class="ClearLines.Anakin.TaskPane.AnakinView"
    xmlns="http://schemas.microsoft.com/winfx/2006/xaml/presentation"
    xmlns:x="http://schemas.microsoft.com/winfx/2006/xaml"
    Height="300" Width="300">
    <StackPanel>
        <Button Width="75" Height="30"
                HorizontalAlignment="Left">
            Refresh
        </Button>
    </StackPanel>
</UserControl>
If you have worked with html before, you should have a mysterious feeling of deja-vu: this is pretty similar to the markers used on a classic webpage. We have a <StackPanel> opening, which closes at </StackPanel>, and contains a <Button>, which contains some text, “Refresh” (A StackPanel is a container, where each item will be displayed as stacked on top of each other).
Just for kicks, try this – inside the button, replace “Refresh” by <CheckBox/>. You’ll see that your button, instead of text, now contains a… checkbox. Now think how difficult it would be to create a button-with-a-checkbox with classic Windows forms. Granted, this is a silly example, but it gives a taste of the flexibility of WPF: you can combine virtually any control into more complex controls, to do whatever you want. This can prove very useful for situations where, for instance, you need to create a list of items where each item has text editable in textboxes, images, calendars, buttons, and whatnot; it’s not necessarily easy, but it is possible.
Now let’s make some final minor modifications: add a TreeView control, some margins, and remove the default 300x300 size of the control, so that rather than having a fixed size, the control will adjust to its container, and fill in the entire space available if docked.
<UserControl x:Class="ClearLines.Anakin.TaskPane.AnakinView"
    xmlns="http://schemas.microsoft.com/winfx/2006/xaml/presentation"
    xmlns:x="http://schemas.microsoft.com/winfx/2006/xaml">
    <StackPanel Margin="5">
        <Button Width="75" Height="30"
                Margin="0,0,0,5"
                HorizontalAlignment="Left">
            Refresh
        </Button>
        <TreeView Height="200"></TreeView>
    </StackPanel>
</UserControl>
It is time to add our control to the TaskPane. Open the TaskPaneView, select ElementHost in the WPF Interoperability section of the ToolBox, and drag it onto the TaskPaneView. The following menu will appear
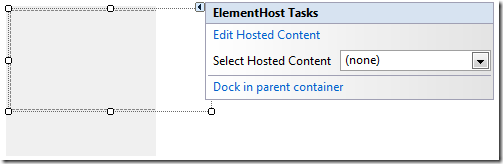
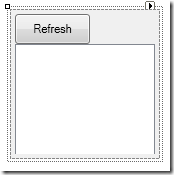
In the Select Hosted Content combo box, you should see AnakinView listed (if not, build your solution once and try again) – select that, and click “Dock in parent container”. Your control should look like this now, with the WPF control completely filling the TaskPaneView control:
In essence, what we did is use the Task Pane as an empty shell, whose only purpose is to provide a location for our WPF control to exist.
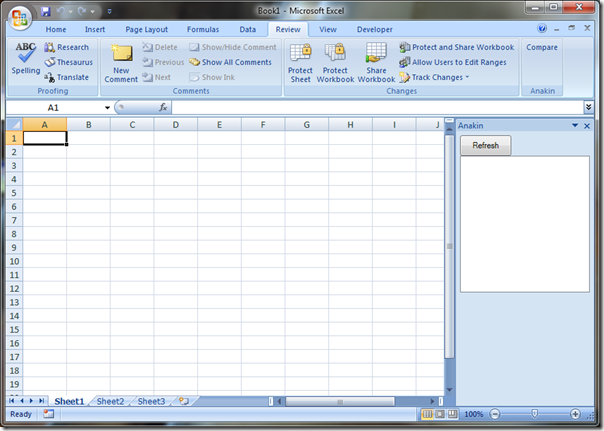
Hit F5 to run in debug mode: when you click “Compare” in the Review tab, you’ll see that the Task Pane now proudly displays our WPF control.
That’s it for today! The TreeView control is in place, next time, we will fill it in with the workbooks and worksheets currently open.